Product properties are essential for configuring and managing the attributes of products within a system. These settings help ensure data consistency and simplify the management of product information. In this guide, we will walk you through the steps to access and configure product properties.
Navigating to Product Categories
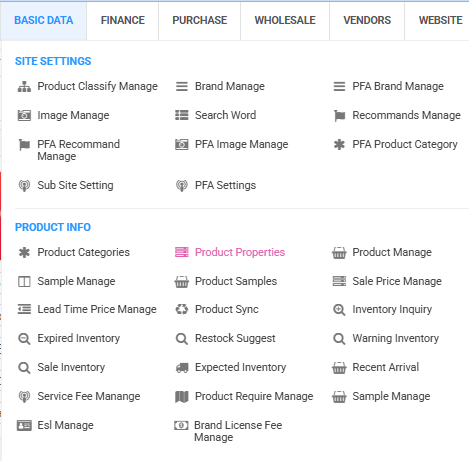
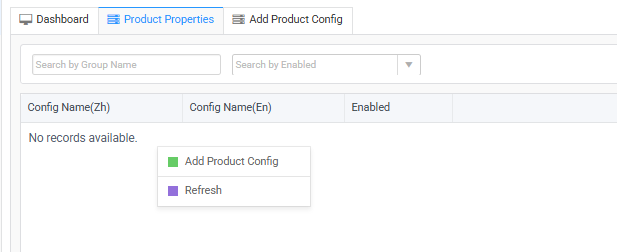
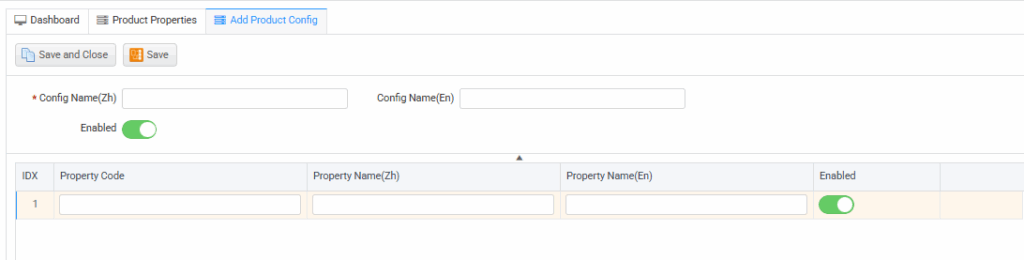
To begin, navigate to the Basic Data tab. Under the Product Info section, click on Product Properties. Once the details appear, right-click to Add Product Config and fill in the necessary information. When you’re ready, scroll to the lower part of the Add Product Property screen and click to proceed.
Details Under the Tab of Product Properties #
Below are the fields you need to fill out when configuring product properties:
- Config Name (Zh) – Enter the Chinese name for the product configuration.
- Config Name (En) – Enter the English name for the product configuration.
- Enabled – Toggle this option to enable or disable the configuration.
Steps to Add Product Config
- Right-click and choose Add Product Config.
- Fill in the following details:
- Config Name (Zh): Enter the name in Chinese.
- Config Name (En): Enter the name in English.
- Enabled: Toggle to enable or disable.
- After completing the config, proceed to the lower section and right click to add Product Property.
To Add a Property #
To add a new product property, follow these steps:
- Idx: Enter the unique index number.
- Property Code: Assign a specific code to the property.
- Property Name (Zh): Enter the property name in Chinese.
- Property Name (En): Enter the property name in English.
- Enabled: Use the toggle button to enable or disable the property.
Here’s an image to guide you through the process:
By following these steps, you will be able to effectively configure and manage your product properties, ensuring consistency across the system. For detailed walkthrough you can refer to the video guide: Product Properties