Introduction #
The Product Manage section is essential for managing product data, inventory, and various product configurations. Through this section, users can add, edit, and manage product details, sync with WMS, and export product-related information. The Product Manage tab provides multiple functionalities that allow efficient handling of product information in a systematic manner.
Navigating to Product Categories
To start managing your product data, follow these steps:
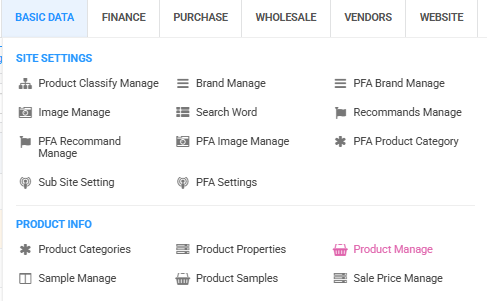
- Navigate to the Basic Data tab.
- Under the Product Info section, click on Product Manage.
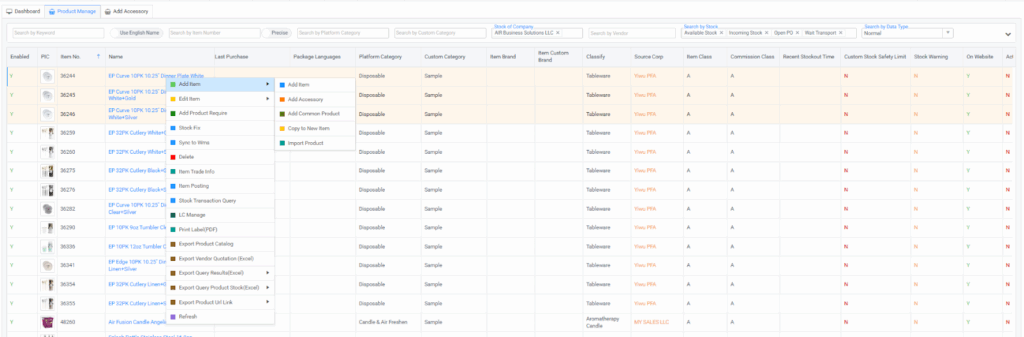
- Once the details appear, right-click to see various management options, such as Add Product, Edit Product, Stock Fix, and others.
Available Product Manage Options #
In the Product Manage tab, you can manage products by selecting from the following options:
- Add Product: Create new product entries.
- Edit Product: Modify existing product information.
- Add Product Require: Set specific requirements for products.
- Stock Fix: Adjust discrepancies in stock levels.
- Sync to WMS: Synchronize product data with the Warehouse Management System.
- Delete: Remove products from the system.
- Item Trade Info: View or modify trade-related information for products.
- Item Posting: Manage product posting data.
- Stock Transaction Query: Query the transaction history of stock for specific products.
- LC Manage: Manage Letter of Credit (LC) details.
- Print Label PDF: Generate PDF labels for products.
- Export Product Catalog: Export the entire product catalog for reporting or distribution.
- Export Vendor Quotation (Excel): Export vendor quotations to Excel.
- Export Query Product Stock (Excel): Export product stock queries to Excel.
- Export Product URL Link: Export the URL link for a product to share externally.
Adding Items #
When you click on Add Item, you will need to select the Category and then save. These options require minimal information to be filled in, focusing mainly on selecting the product. #
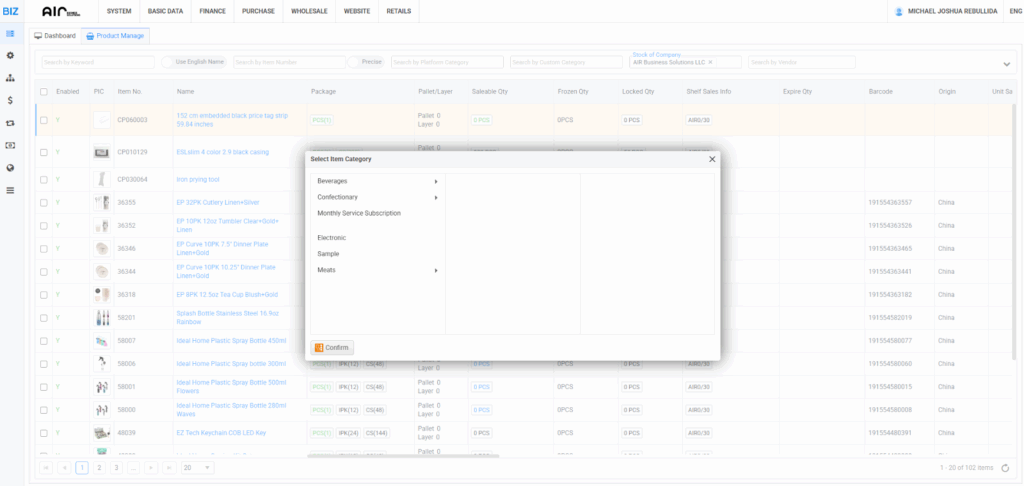
After choosing your selected Category for the Item that you want to add, a new window will show. On this window, fill up the necessary information in order to add the item. Refer to image below:
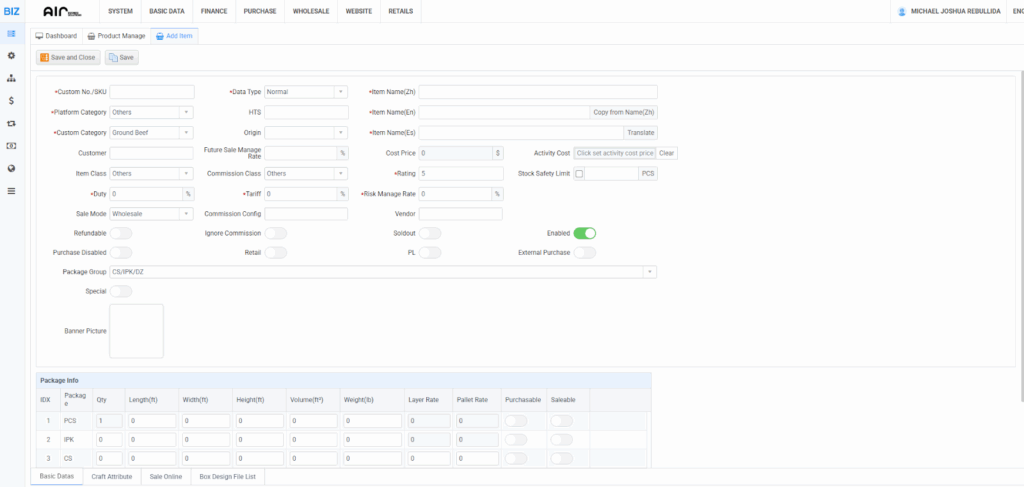
Based on the example provided, these are the following fields that are required to be filled in order to successfully add an item:
- Custom No./SKU → The product’s unique code or stock-keeping unit.
- Data Type → The kind of item (e.g., Normal, Accessory, Common).
- Accessory → Items that are add-ons or supporting products (e.g., phone chargers, cables, side items).
- Common → General items that don’t need special categorization.
- Normal → Standard or regular products (the default classification).
- Item Name (Zh) → Product name in Chinese.
- Item Name (En) → Product name in English.
- Custom Category → The specific product category (e.g., Ground Beef).
- Item Class → General classification of the item (e.g., Others).
- Commission Class → How commission is categorized for this item.
- Duty → Import duty percentage applied to the item.
- Tariff → Tariff rate percentage for the item.
- Rating → Star rating or quality score of the item.
- Risk Manage Rate → Risk rate percentage (used for financial/stock risk tracking).
In short: these required fields are for product identification, categorization, and financial setup in the system.
Add Accessory #
To add an accessory to a product, you will need to fill in more detailed information:
- Custom No./SKU
- Item Name (Zh) (Chinese name)
- Platform Category
- Item Name (En) (English name)
- Copy from Name (Zh) (Copy the name from the Chinese name field)
- Custom Category
- Data Type
- Origin
- Latest Vendor
- Latest Purchase Price
- Description (Zh) (Chinese description)
- Description (En) (English description)
- Enabled (Toggle button to enable or disable the accessory)
Product Manage Tab Structure #
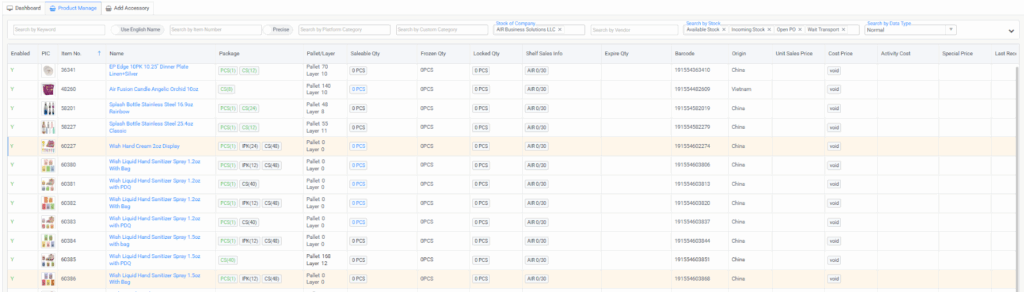
The Product Manage tab provides various search options to help you find specific products quickly. Here are some key search criteria:
- Search by Keyword
- Search by Item Number
- Search by Platform Category
- Search by Custom Category
- Search by Vendor
- Available Stock
- Incoming Stock
- Open PO
- Wait Transport
- Search by Stock
- Search by Data Type
- Search by Barcode
- Search by Package Language
- Search by Attributes
- Search by Classify
- Search by Item Brand
- Search by Item Custom Brand
- Search by Source Corp
- Search by Item Class
- Search by Commission Class
- Search by Soldout
- Search by Recent Stockout
- Search by Stock Warning
- Search by Custom Stock Safety Limit
- Search by Enabled
- Search by Purchase
- Search by Recommend Disabled
- PL (Price List)
- Sale Price
- Special Price
- Activity Cost
- Customized Property
- Property Content
- Retail
- Search by Origin
This allows you to filter and locate products based on several attributes like stock levels, prices, vendors, and more.
Here’s an image to guide you through the process:
For a detailed walkthrough, please refer to the video guide: Product ManageBy using the Product Manage tab effectively, businesses can streamline their product data management, monitor stock levels, manage vendor information, and ensure the smooth flow of product-related processes. These tools and functionalities make it easier to organize and update product details in the system.
How to Disable Items with 0 Stock #
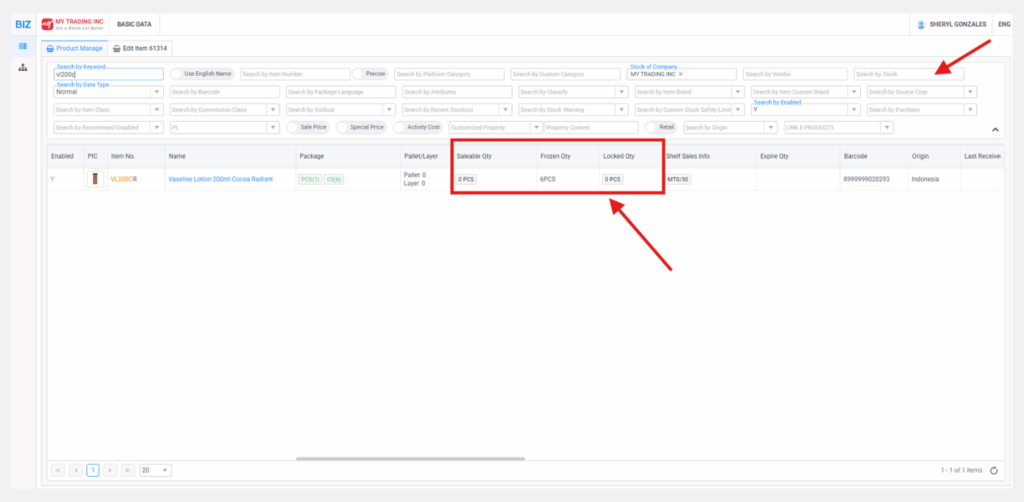
If you need to remove products with no available stock from active listings, follow these steps:
- Navigate to Product Manage
- Go to Basic Data → Product Info → Product Manage.
- Find 0-Stock Items
- Search your product list for items with Saleable Qty or Locked Qty equal to 0.
- Note: Items with quantities greater than 0 cannot be disabled (except in cases where there is only Frozen Qty, as per Susie’s exception).
- If the “Search in Stock” filter is auto-filled, remove it so you can see the item numbers provided.

- Edit the Product
- Right-click on the desired product and select Edit Item.
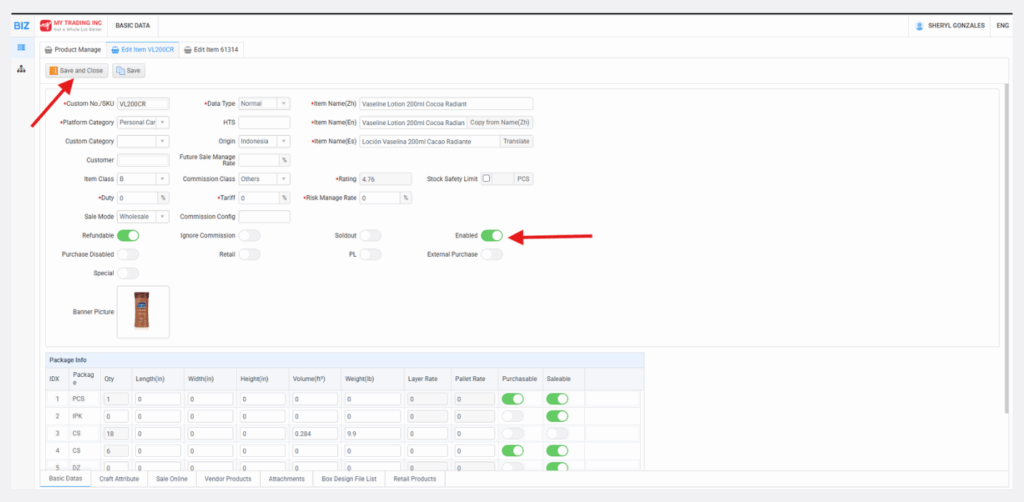
- Disable the Product
- Turn off the Enabled switch.
- Save Changes
- Click Save or Save and Close.
- Once disabled, the product will no longer appear in active listings.
Instructions for Updating Product Images
- Dashboard
- Log in to the system and go to the Product Manage tab from the dashboard
- Log in to the system and go to the Product Manage tab from the dashboard
- Edit
- Locate the item on the list and right-click on it. Then select Edit Item.
- Locate the item on the list and right-click on it. Then select Edit Item.
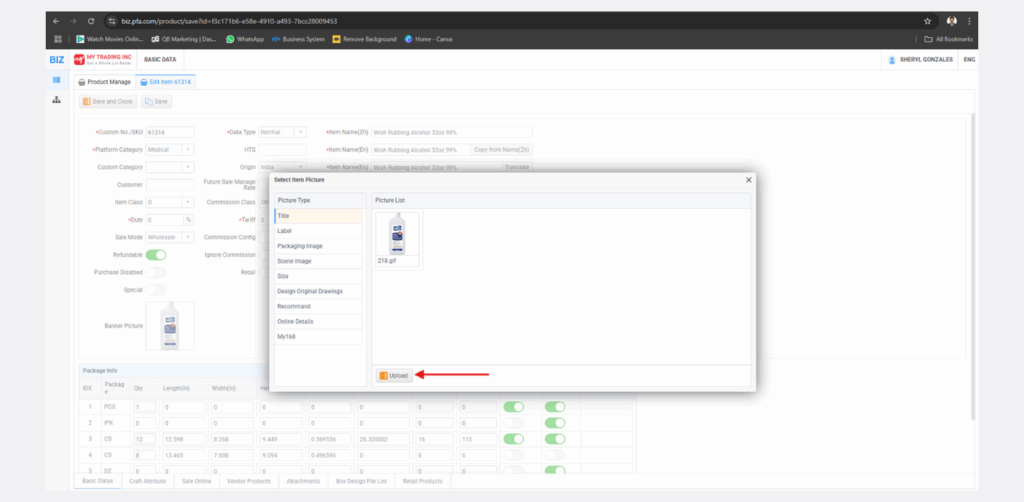
- Image & Upload
- In the Edit Item window, scroll down to the Banner Picture section.
- Click the Upload button to add a new image.
- Add Photo
- Once the photo is uploaded, right-click on the newly added image and select Insert.
- Once the photo is uploaded, right-click on the newly added image and select Insert.
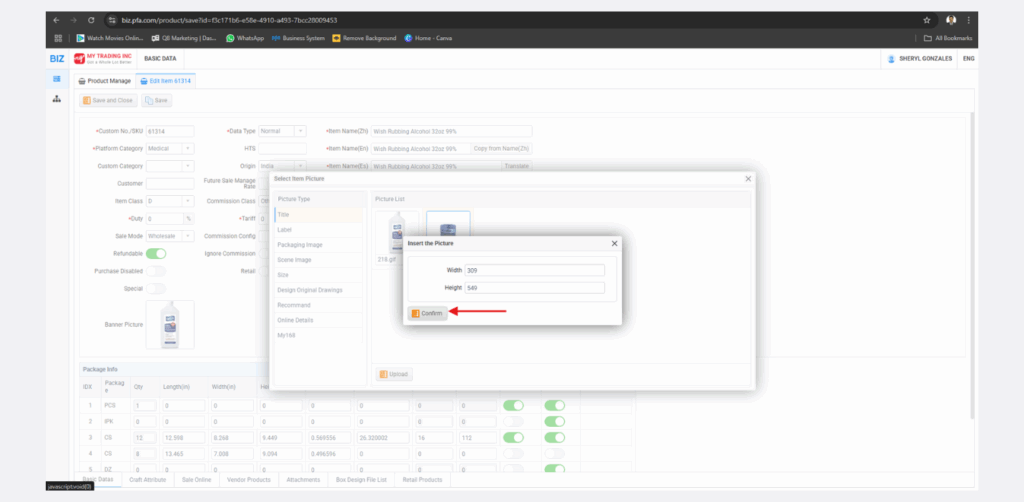
- Save
- Don’t forget to save your changes.
- Click Save or Save and Close to apply the modifications.