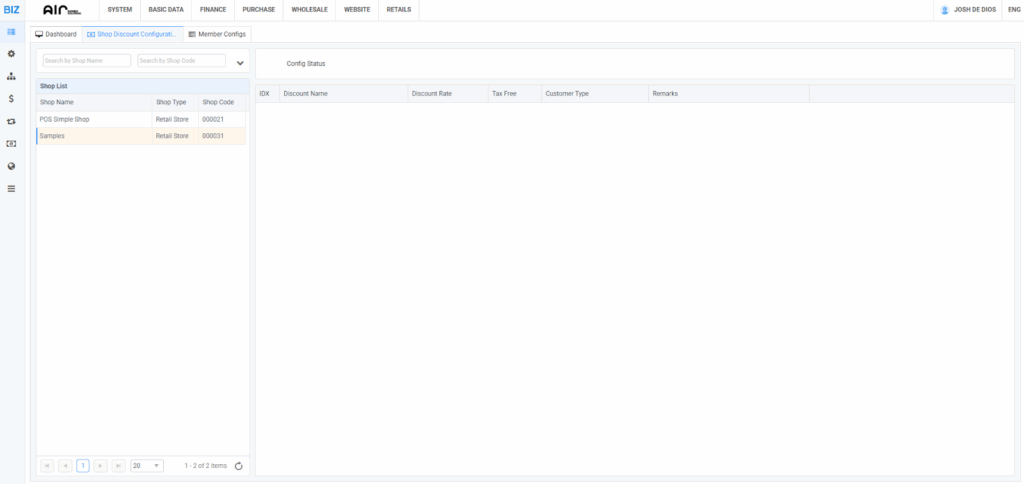
This feature lets you set up and manage discount rules for each shop in your POS system.
- On the left side, you’ll see a Shop List. This shows all your shops (e.g., POS Simple Shop, Samples) along with their type and code. You can select a shop here to configure its discounts.
- On the right side, you’ll see the Config Status area. This is where the discount settings for the selected shop will appear.
For each shop, you can define:
- Discount Name – The title or label for the discount (e.g., “Holiday Sale,” “Member Discount”).
- Discount Rate – The percentage discount applied.
- Tax Free – Option to make the discount tax-free if needed.
- Customer Type – Decide which customer groups can use this discount.
- Remarks – Notes or additional details about the discount.
Right Click Option on Shop List #
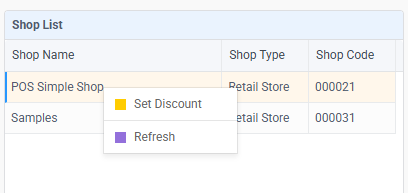
This feature allows you to set discount rules to your specific shop.
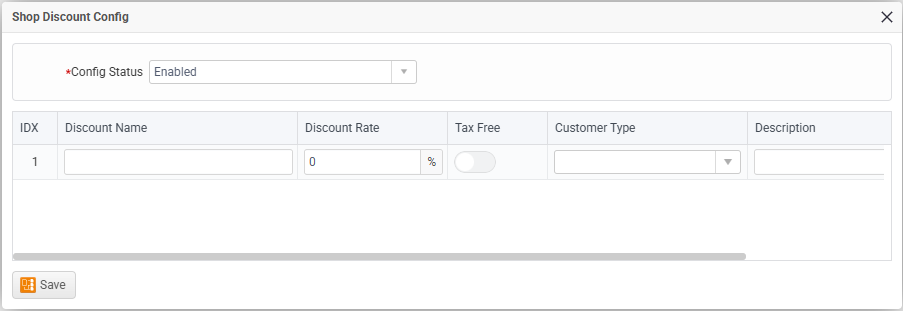
The image above will pop up after clicking the Set Discount option.
Here’s what each part means in simple terms:
- Config Status – Lets you enable or disable the discount setup. (If set to “Enabled,” the discount is active.)
- Discount Name – Where you type in the name of the discount (e.g., “Holiday Sale,” “VIP Discount”).
- Discount Rate (%) – The percentage of the discount you want to give (e.g., 10%, 20%).
- Tax Free – A toggle (switch) to decide if this discount should remove taxes or not.
- Customer Type – Lets you choose which type of customers can use this discount (e.g., regular, wholesale, members).
- Description – A field to add notes or details about the discount (optional).
Save Button – Once you’re done setting everything, click Save to apply the discount.