Understanding System – Role Manage #
In any company, managing access is crucial for security and efficiency. System – Role Manage allows administrators to define user roles, set permissions, and control access, ensuring employees only use the tools and data relevant to their roles.
Key Features of System – Role Manage #
- Role Assignment – Define and assign specific roles within the organization.
- Access Control – Manage viewing, editing, and deleting permissions across departments.
- User Management – Add, remove, and modify user roles.
- System Monitoring – Track login activities and access history to enhance security.
User Management: Adding Users to Roles
The User Management feature enables administrators to add users to specific roles based on their responsibilities. When managing users, the following details are included:
User List #
- Username – Unique identifier for the user.
- Real Name – Full name of the employee.
- Status – Indicates whether the user is active or inactive.
- Super Admin – Specifies if the user has administrative privileges.
- Gender – User’s gender information.
- Phone – Contact number.
- Mobile No. – Additional mobile number.
- Email – Official email address.
- Remarks – Notes or additional information.

How to Add a User to a Role #
To add a new user to a role:
- Navigate to the User Management section.
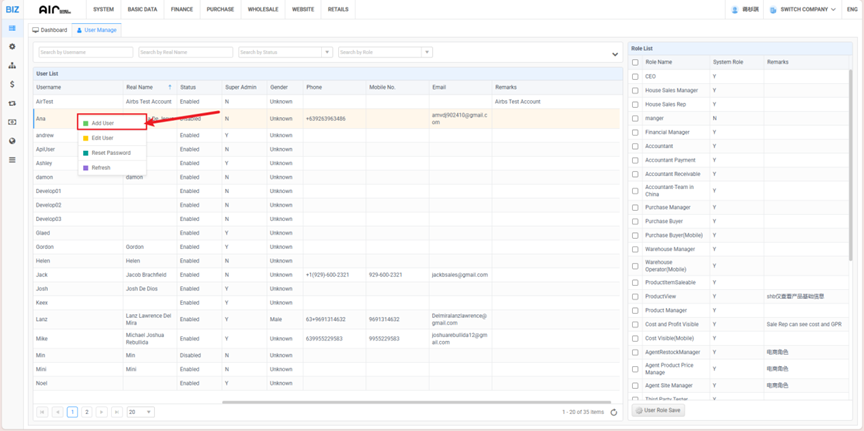
- Locate the User List.
- Right-click on an empty area within the list.
- Select Add User from the menu.
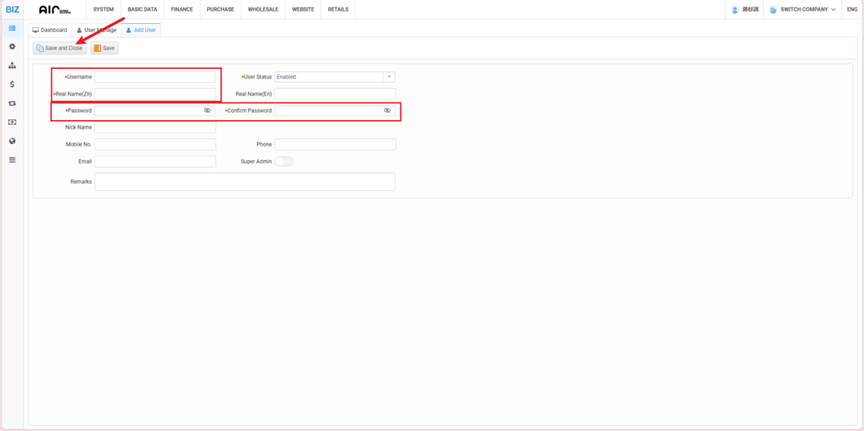
- Enter the required user details.
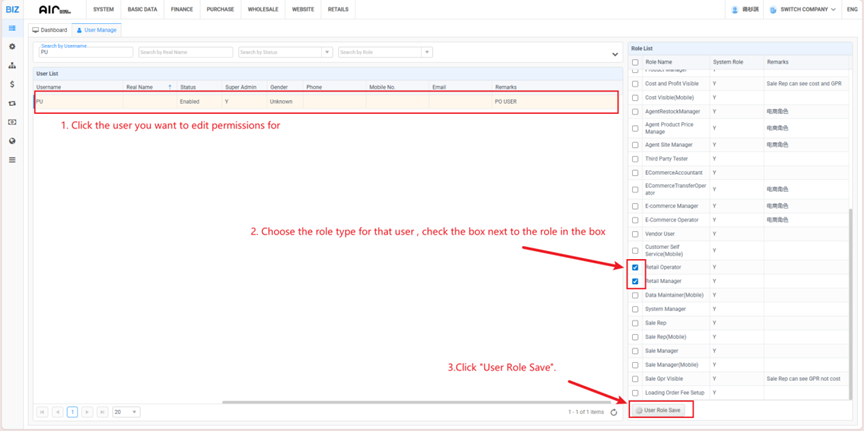
- Choose the appropriate role from the Role List.
- Confirm the selection and save changes.
1. How to create a Account in AirPOS using BIZ and WMS
User management is mainly responsible for managing different user information, and can grant users necessary permissions based on their needs.(Take BIZ for example)
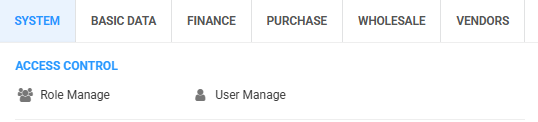
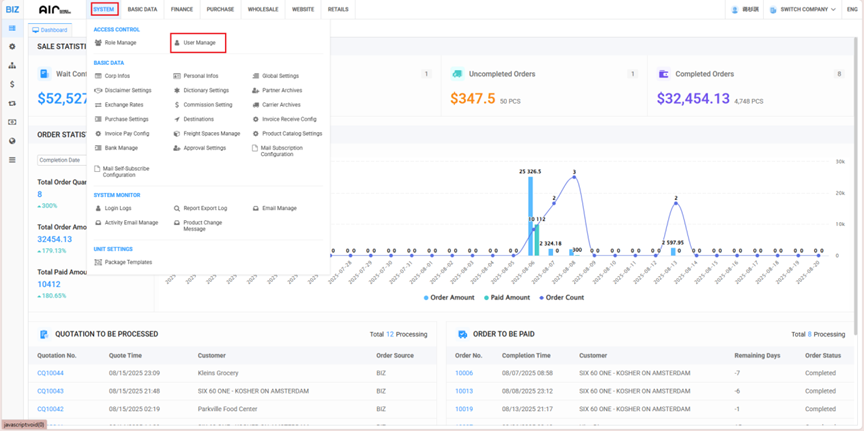
Step 1: Select the User Management TAB in System Settings
Step 2:Right-click on the user management interface and select “Add User” to enter the user addition interface.
Step 3: On this screen, enter your username, user status, real name, password, and password confirmation, then click “Save and Close”.
Step 4: Select the user you want to edit permissions for, choose the role type for that user in the Role Management on the right, check the box next to the role in the box, and then click “User Role Save”.
Role List #
The Role List defines various roles within the system and their permissions:
| Role Name | System Role | Remarks |
| CEO | Y | |
| House Sales Manager | Y | |
| House Sales Rep | Y | |
| manager | Y | |
| Financial Manager | Y | |
| Accountant | Y | |
| Accountant Payment | Y | |
| Accountant Receivable | Y | |
| Accountant-Team in China | Y | |
| Purchase Manager | Y | |
| Purchase Buyer | Y | |
| Purchase Buyer(Mobile) | Y | |
| Warehouse Manager | Y | |
| Warehouse Operator(Mobile) | Y | |
| Product Manager | Y | |
| Cost and Profit Visible | Y | Sale Rep can see cost and GPR |
| Agent Product Price Manage | Y | |
| Agent Site Manager | Y | |
| Third Party Tester | Y | |
| E-commerce Manager | Y | |
| E-Commerce Operator | Y | |
| Vendor User | Y | |
| Customer Self Service(Mobile) | Y | |
| Retail Operator | Y | |
| Retail Manager | Y | |
| Data Maintainer(Mobile) | Y | |
| System Manager | Y | |
| Sale Rep | Y | |
| Sale Rep(Mobile) | Y | |
| Sale Manager | Y | |
| Sale Manager(Mobile) | Y | |
| Sale Gpr Visible | Y |
Swap-Up: Enhancing Role Management #
To improve role management:
- Regularly review and update role permissions.
- Restrict access based on job responsibilities.
- Monitor system logs for unauthorized access.
- Educate employees on security protocols and access control.
Using System – Role Manage, businesses ensure a structured, secure, and efficient workflow, allowing only authorized personnel to access critical data and perform key functions.
Notes: All our Product is connected to this specific option, so when we add permission here if its connected to AirPOS, and WMS they will be having access to those websites/applications as well (it is necessary to create a retail operator, and the users associated with the retail operator should be subject to permission control.)