A Practical Guide to Handling Sales Orders Efficiently #
Sales Orders are at the heart of every wholesale operation — from confirming customer requests to processing fulfillment and tracking deliveries. This guide walks you through how to navigate, create, and manage sales orders with all the features and options your system provides.
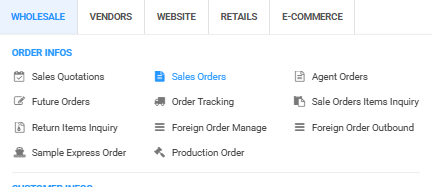
Navigating Sales Orders #
To access Sales Orders in the system:
- Go to the “Wholesale” tab.
- Under Order Info, click Sales Orders.
- The order list will appear.
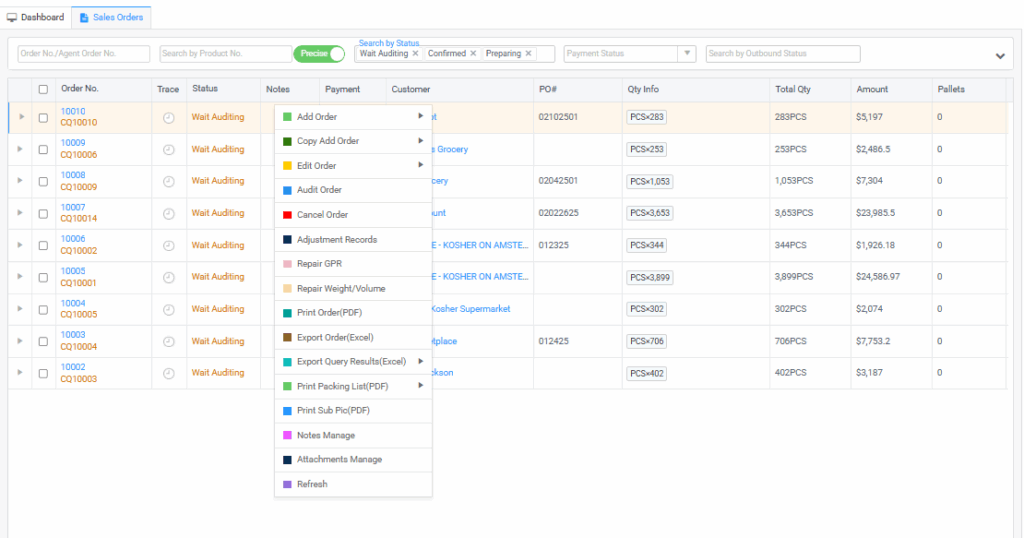
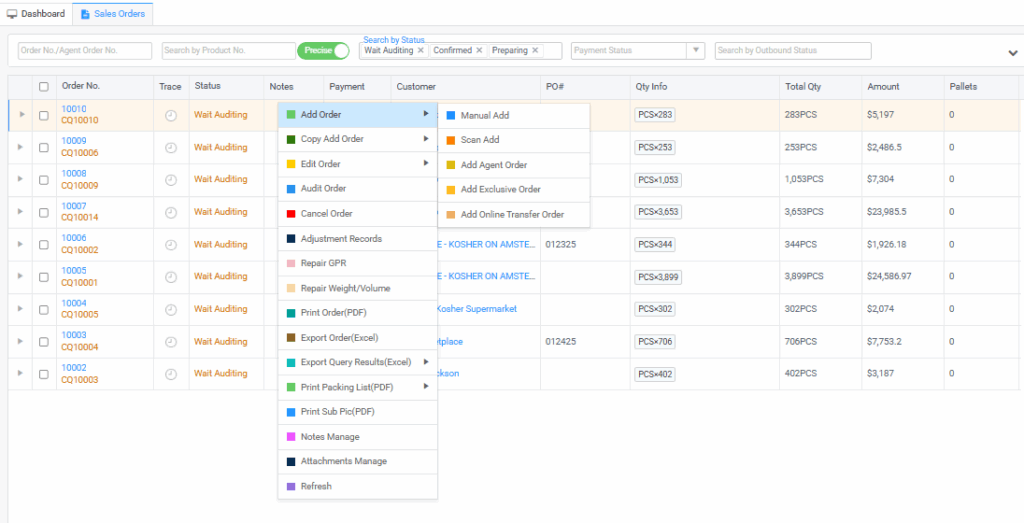
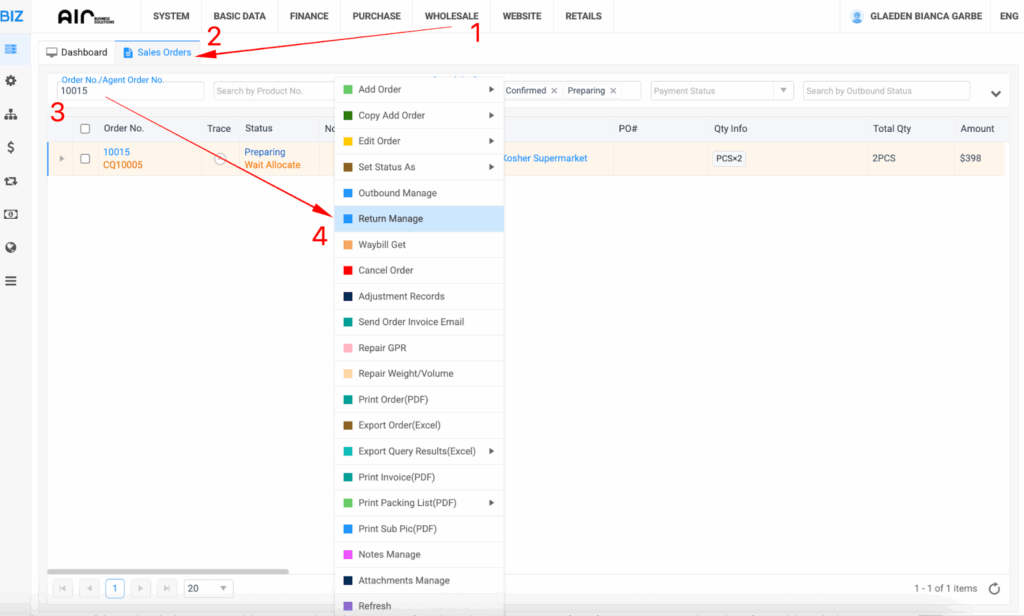
- Right-click on a product to bring up a menu of available actions:
Available Actions #
- Add Order
- Manual Add
- Scan Add
- Add Agent Order
- Add Exclusive Order
- Add Online Transfer Order
- Copy Add Order
- Manual Add
- Scan Add
- Edit Order
- Edit Order Price
- Edit Order Remark
- Expected Date Change
- Update Customer Address Info
- Set Status As
- Wait Auditing
- Preparing
- Completed
- Outbound Manage
- Return Manage
- Waybill Get
- Cancel Order
- Adjustment Records
- Send Order Invoice Email
- Repair GPR
- Repair Weight/Volume
- Print Order (PDF)
- Export Order (Excel)
- Export Query Results (Excel)
- Chinese
- English
- Print Invoice (PDF)
- Print Packing List (PDF)
- Default
- UPC
- UPC with Graph
- Print Sub Pic (PDF)
- Notes Manage
- Attachments Manage
- Refresh
Creating a Sales Order #
When you choose Add Order, you’ll be given five options:
- Manual Add
- Scan Add
- Add Agent Order
- Add Exclusive Order
- Add Online Transfer Order
All five options share the same order form layout, which includes the following fields:
Header Section Fields: #
- Customer, Sales Representative, PO#
- Order Time, Ship Date, Cancel Date
- Mode of Transport, Carrier
- Customer Discount ($), Order Discount (%)
- Customer Freight ($), Company Freight ($)
- Tax (%) – required field
- Term – required field
Transfer-Specific Fields: #
- Trade Type – e.g., 电商调拨 (E-commerce Transfer)
- Transfer to Corp
- Buyer
- Deliver Warehouse
- Remarks & Customer Remarks
Order Metrics Overview: #
- Weight/Cube: e.g., 0 lb / 0 ft³
- Total Qty: Total number of pieces
- Item Amount, Service Fees, GPR
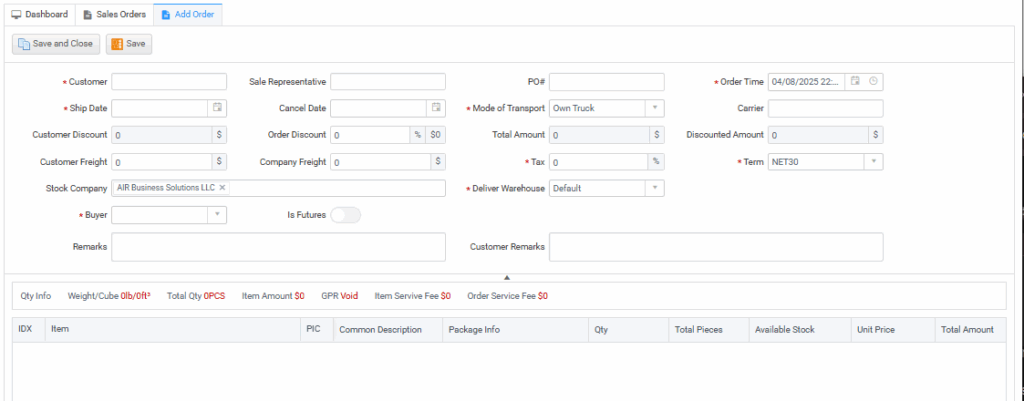
Item Entry Fields Include: #
- IDX, Item, PIC
- Package Info, Qty, Total Pieces
- Transfer Qty, Available Stock
- Unit Price, Total Amount, Discounted Price
- Item Cost, Brand License Fee, GPR
- Last Received, Last Price Sold, Last Quoted Price
- Shelf Sales Info, Service Fee
- Weight/Cube, Discount Amount
- Pallet/Layer Rate, Barcode, Expired Info
Working with Orders: Copy, Edit, and Export #
Copy Add Order #
Includes 2 options:
- Manual Add
- Scan Add
Fields are the same as the original Add Order form and are useful for creating similar orders quickly.
Edit Order #
Also includes 2 options:
- Manual Edit
- Scan Edit
Edit existing orders by adjusting quantities, pricing, or shipment details.
Right-Click Functions in the Lower Panel: #
Inside the order form, right-click to access:
- Add Item
- Multi Add Item
- Import Sale Price
- Refresh Sale Price
These tools help speed up order entry and ensure accurate pricing and availability.
Export & Print Options #
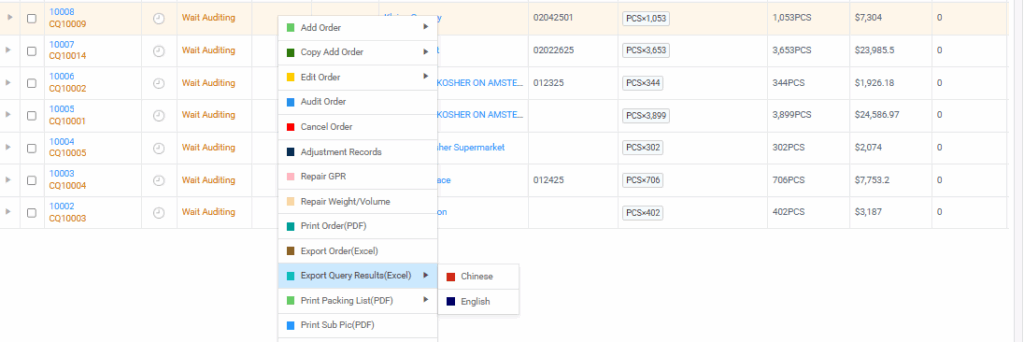
Export Options #
- Export Order – Generate an Excel file of the order.
- Export Query Results – Downloadable in English or Chinese.
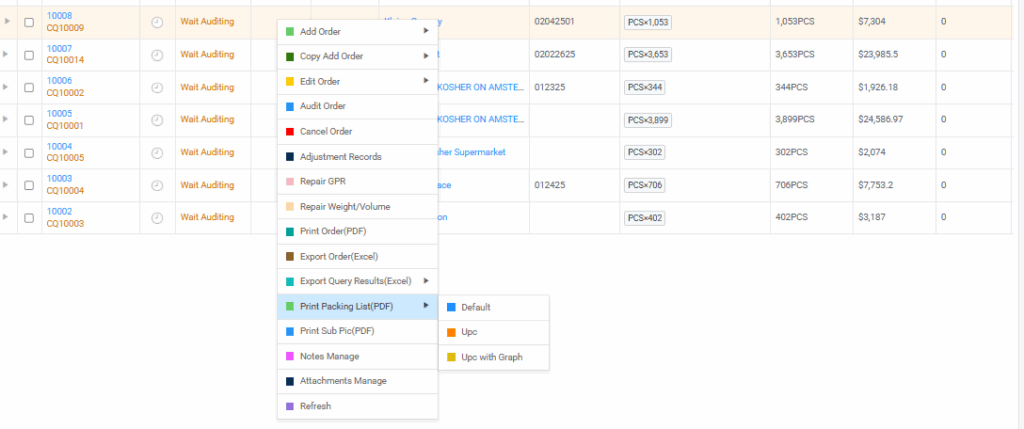
Print Packing List (PDF) #
You can choose from:
- Default format
- UPC format
- UPC with Graph format
Useful for warehouse packing, labeling, and client communication.
Wholesale – Return SKU (Normal) #
Navigation #
- Go to the Wholesale tab.
- Under Order Info, click Sales Orders.
- The order list will appear.
Processing a Normal Return SKU #
Step 1 – Locate the Sales Order #
- Find the Order# for the transaction you need to process a return for.
Step 2 – Open Return Management #
- Right-click on the order.
- Select Return Management.
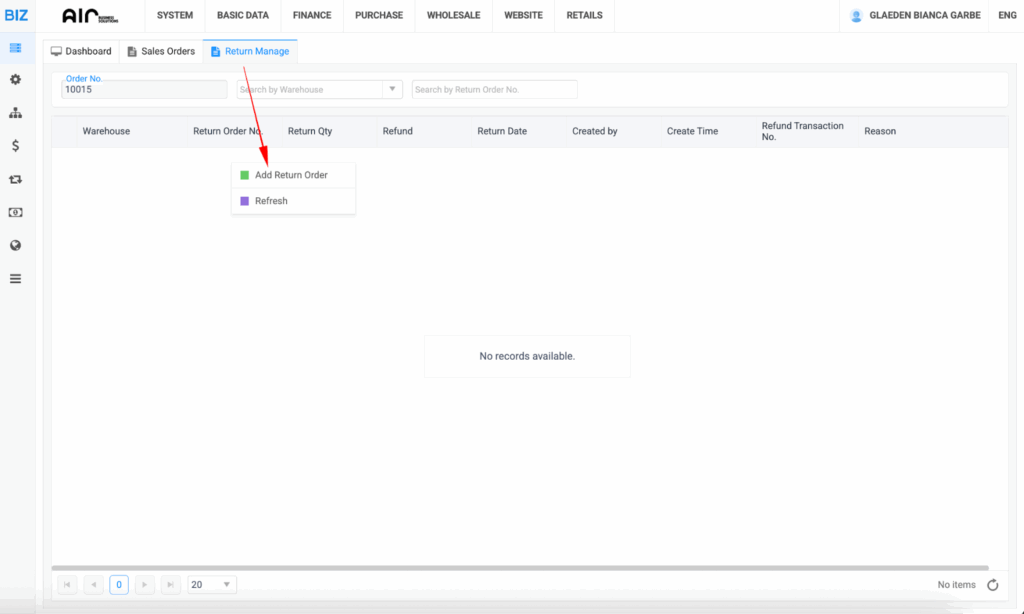
Step 3 – Add Return Order #
- In the Return Management screen, right-click and choose Add Return Order.
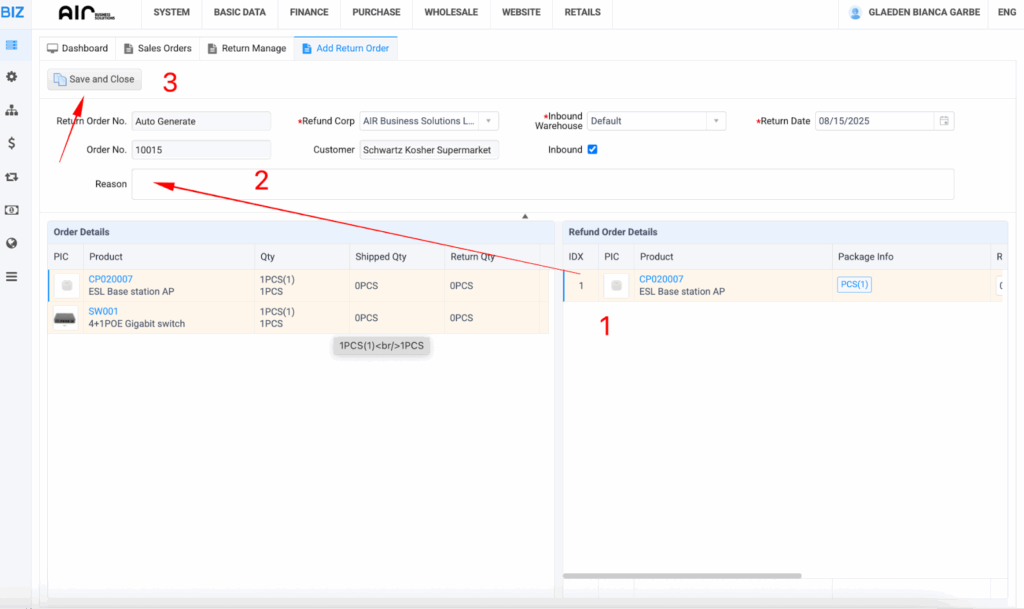
Step 4 – Select the Product to Return #
- From the product list, locate the item you are returning.
- Click Add to include it in the return order.

Step 5 – Input Return Details #
- Enter the Quantity to be returned.
- In the Reason tab, input:
The product doesn’t match the picture
Step 6 – Finalize Return #
- Click Save and Close to complete the return process.
Notes & Best Practices #
- Always verify product codes and quantities before saving the return.
- Include a clear and specific return reason for record accuracy.